If you can host an online meeting using a service like Zoom, you can stream high-quality video and audio from your Ovo Studios fixed lab. Setup is simple:

Here is a sample of 1080P video from an Ovo fixed lab that was streamed and recorded in Zoom.
Detailed Setup Information
Requirements
Using Zoom as the meeting service and Magewell as the capture device, here is what you need:
- An Ovo Studios fixed lab with an HDMI output cable dedicated to Zoom use.
- An HDMI-to-USB capture dongle. Ovo likes the Magewell USB Capture HDMI Plus.
- Configuration software for the video dongle. If you are using the Magewell USB Capture HDMI Plus capture device, their configuration software is available here.
- A computer that you will use to host your Zoom session. It will need a USB 3.0 jack for the Magewell to plug into.
- A Zoom login.
Magewell Capture Device Configuration
By default, the Magewell offers options for resolutions and Zoom will select a low resolution. This will result in a bad viewing experience for your observers. To keep that from happening, you need to do a one-time edit to the supported resolutions on the Magewell so Zoom only has one choice: 1920 x 1080.
Before starting the Magewell configuration software, we need to connect some cables.
- Using Ovo Studios' lab control software, route the video you want to share in Zoom to the HDMI cable you are going to plug into the Magewell device.
- Plug the HDMI cable into the Magewell's HDMI INPUT jack.
- Plug the Magewell's USB 3.0 cable into the Zoom computer's USB 3.0 port.
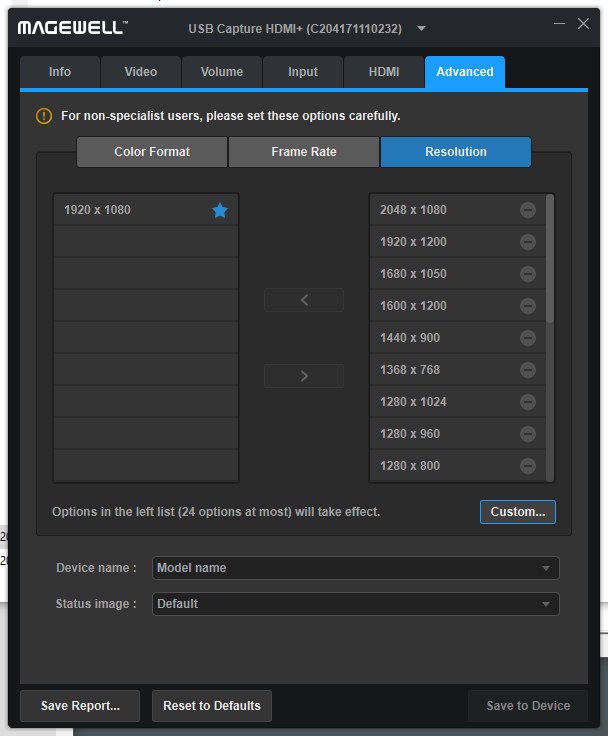
Run the Magewell USB Capture Utility (USBCaptureUtility.exe) on the Zoom computer. Using the controls on the Advanced > Resolution tab, move everything out of the left-hand listbox except the 1920x1080 resolution. You cannot multiselect, so have fun with that. Your end result should look like the screenshot below. The blue star next to the 1920 x 1080 choice in the left-hand listbox indicates that the Magewell recognizes 1920 x 1080 video as the input, so that is a good confirmation that your incoming video is correct.
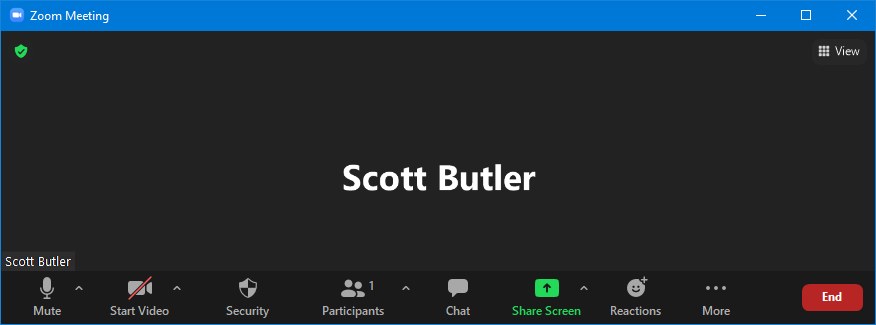
Zoom Meeting Setup
The Zoom meeting window is shown below for reference. To share the video that is coming into the Magewell:
- Do not use the Start Video function to share the output of the Magewell. If Start Video is sharing video, stop it.
- Click the green Share Screen button.
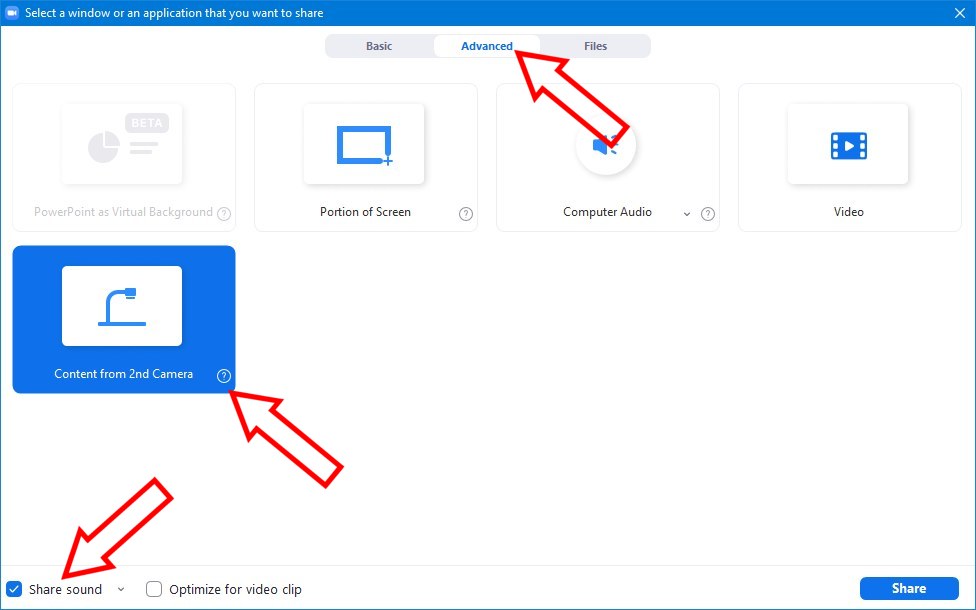
On the Share Screen window, click the following:
- Click the Advanced tab.
- Click Content from 2nd Camera.
- Click the Share sound checkbox to check it.
- Click the Share button.
Note: You might also want to select Optimize for Video Clip which hides the thumbnails for cameras. This "optimizes" for full-screen video screen sharing which one assumes yields better performance.
A window will appear and sharing will start. You might get lucky and the Magewell will be selected as the source for content. If not, you will have to use the Switch Camera button to cycle sources until the Magewell is selected.
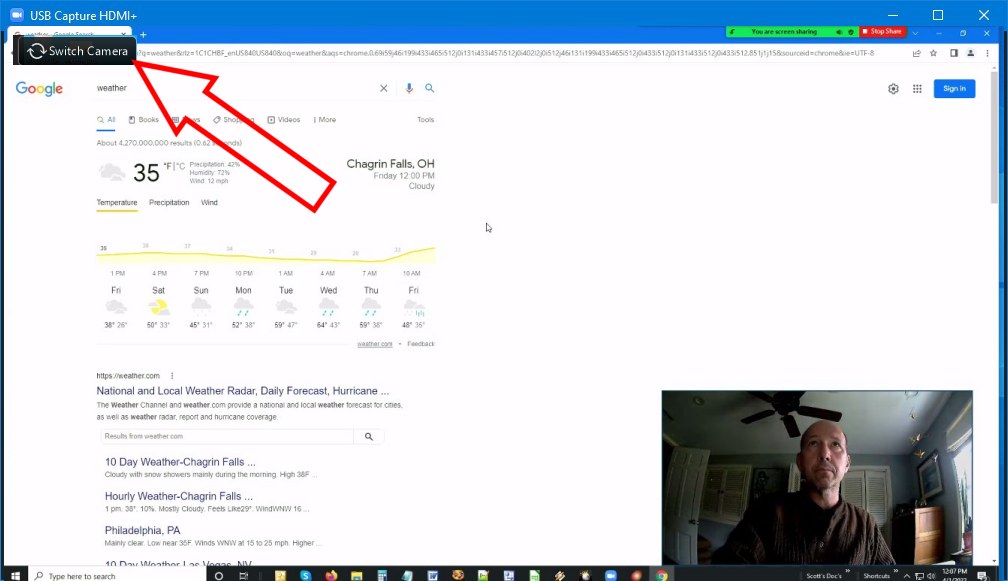
After the Magewell is selected, you will see the video preview and at this point, remote observers on the Zoom meeting can watch the usability test.
Audio Gotchas
As meeting host, you will not be able to hear the audio on your computer. If this strikes you as odd, just think about how Zoom handles microphone audio: you do not hear yourself talking in a meeting. Likewise, Zoom does not play the audio from your shared device. If you want to verify audio in your meeting, sign in from another device, like your phone.
Work-around for 2nd Camera Sound Sharing
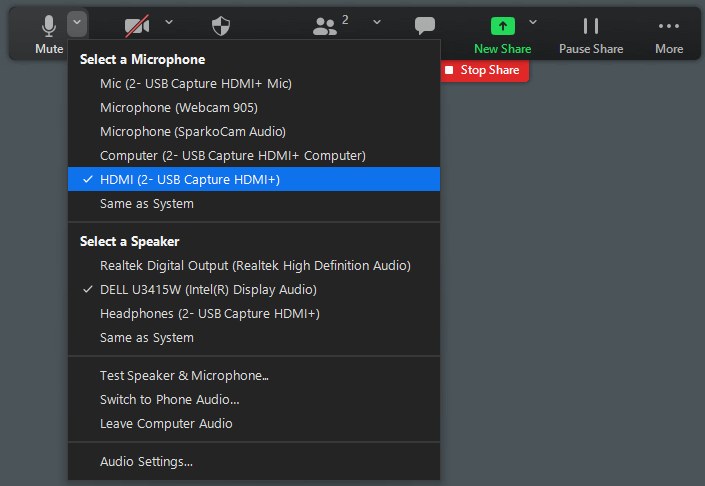
Zoom can be a little buggy/unintuitive when it comes to sharing audio from a second camera. If the above did not result in lab audio being shared in your meeting, you might need to also do the following:
- Select the HDMI (2- USB Capture HDMI+) device as your microphone.
- Unmute your microphone.
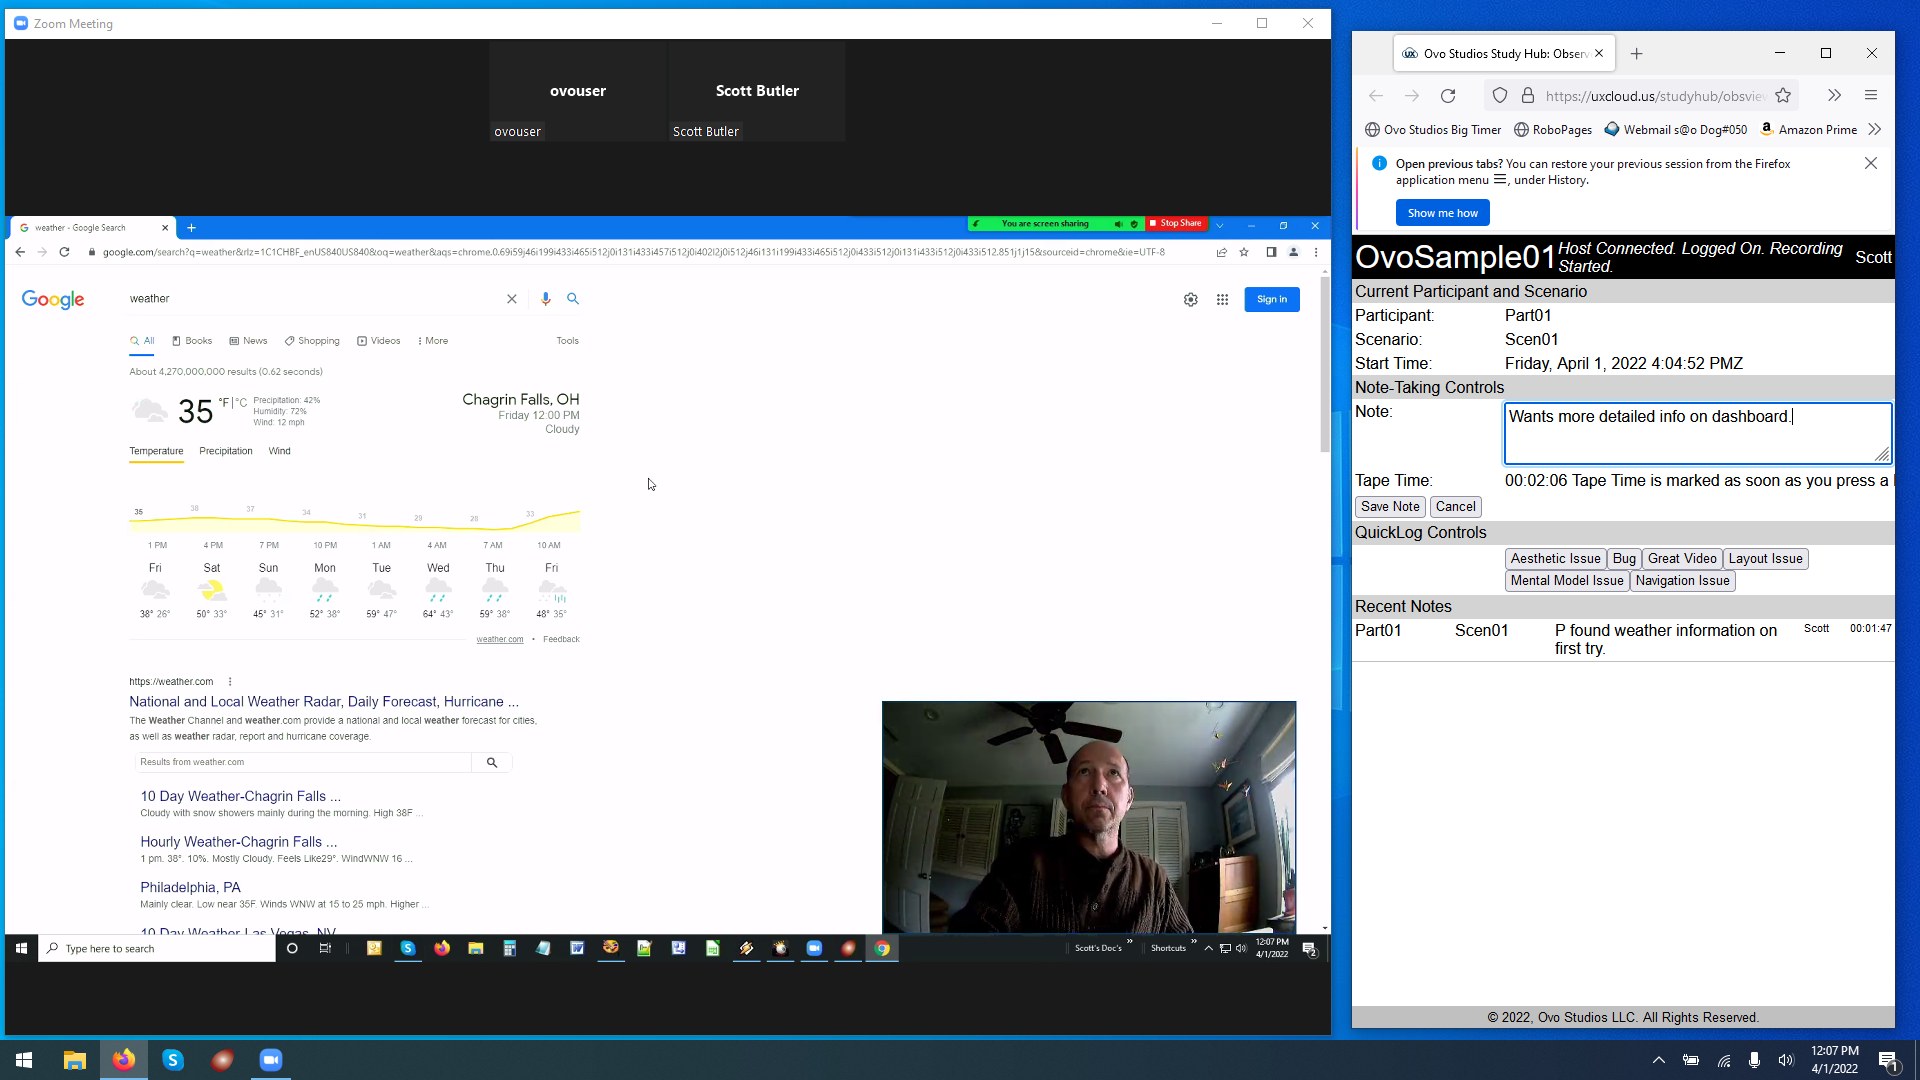
Zoom Viewing Combined with Ovo's Study Hub Feature
An observer's computer screen is shown below. The Zoom meeting is on the left 75% of the screen. On the right of the screen is Ovo's Study Hub feature. If you choose to use Ovo's Study Hub feature, observers can log observations while they watch the test. The video in the sample below is a picture-in-picture of an HDMI feed from the participant PC running at 1080P with an HDMI camera feed inserted into the bottom-right of the picture.